Getting started with Docker - Creating an R Shiny app container as an use-case
Docking or containerization is a new method of distribute a software/tool. Beside providing only the source code for installing, we give the users the so-called container, which contains the whole environment to run the program, including the tool and its dependencies with the exact version and all the needed configurations. By delivering such a “container”, users are always able to “reuse” the tool and reproduce the results as we did.
Table of Contents
Basic steps
- Create a Docker account and install Docker to your computer
- Create a folder called PhyloProfileDocker to store configuration files and codes
- Write a Dockerfile and put it to the PhyloProfileDocker
- Go to PhyloProfileDocker folder and build a docker image with a tag using the command
docker build -t latest . - Check the available images with
docker imageswe will get something like this:
REPOSITORY            TAG                 IMAGE ID            CREATED             SIZE
latest                latest              c7b3a6ffcf11        3 months ago        2.31GB
phyloprofile          latest              c7b3a6ffcf11        3 months ago        2.31GB
rocker/r-ver          3.6.0               21b1d461026d        3 months ago        606MB
Lauch a local docker image
- First, get the list of available images
docker images - Lauch a docker image using the image’s tag (e.g.
latest)docker run -p 8080:80 -i -t latestThen start the shiny application on the web browser using the address
localhost:8080
Working with Docker Hub
We can upload the image to DockerHub and run from any other computers where the internet connection is available and Docker can be installed. I copy here the steps being shown in the link above:
- Log in to https://hub.docker.com/
- Click on Create repository
- Choose a name (e.g. phyloprofile) and a description for the repository and click Create
- Log into the Docker Hub from the command line
docker login --username=trvinh --email=trvinh@gmail.comAnd enter password when prompted. Don’t forget to change the username and email :-)
- Check the image IDs using
docker imageswe will get:
REPOSITORY TAG IMAGE ID CREATED SIZE latest latest c7b3a6ffcf11 3 months ago 2.31GB phyloprofile latest c7b3a6ffcf11 3 months ago 2.31GB rocker/r-ver 3.6.0 21b1d461026d 3 months ago 606MB - Tag the image we want to upload using the corresponding image ID (e.g.
c7b3a6ffcf11)docker tag c7b3a6ffcf11 yourhubusername/phyloprofile:firsttry - Push your image to the repository we created in step 3
docker push yourhubusername/phyloprofile - Run the image from Docker Hub (in any computer with Docker already installed)
docker run -p 8080:80 trvinh/phyloprofileand start the shiny application on the web browser using the address
localhost:8080
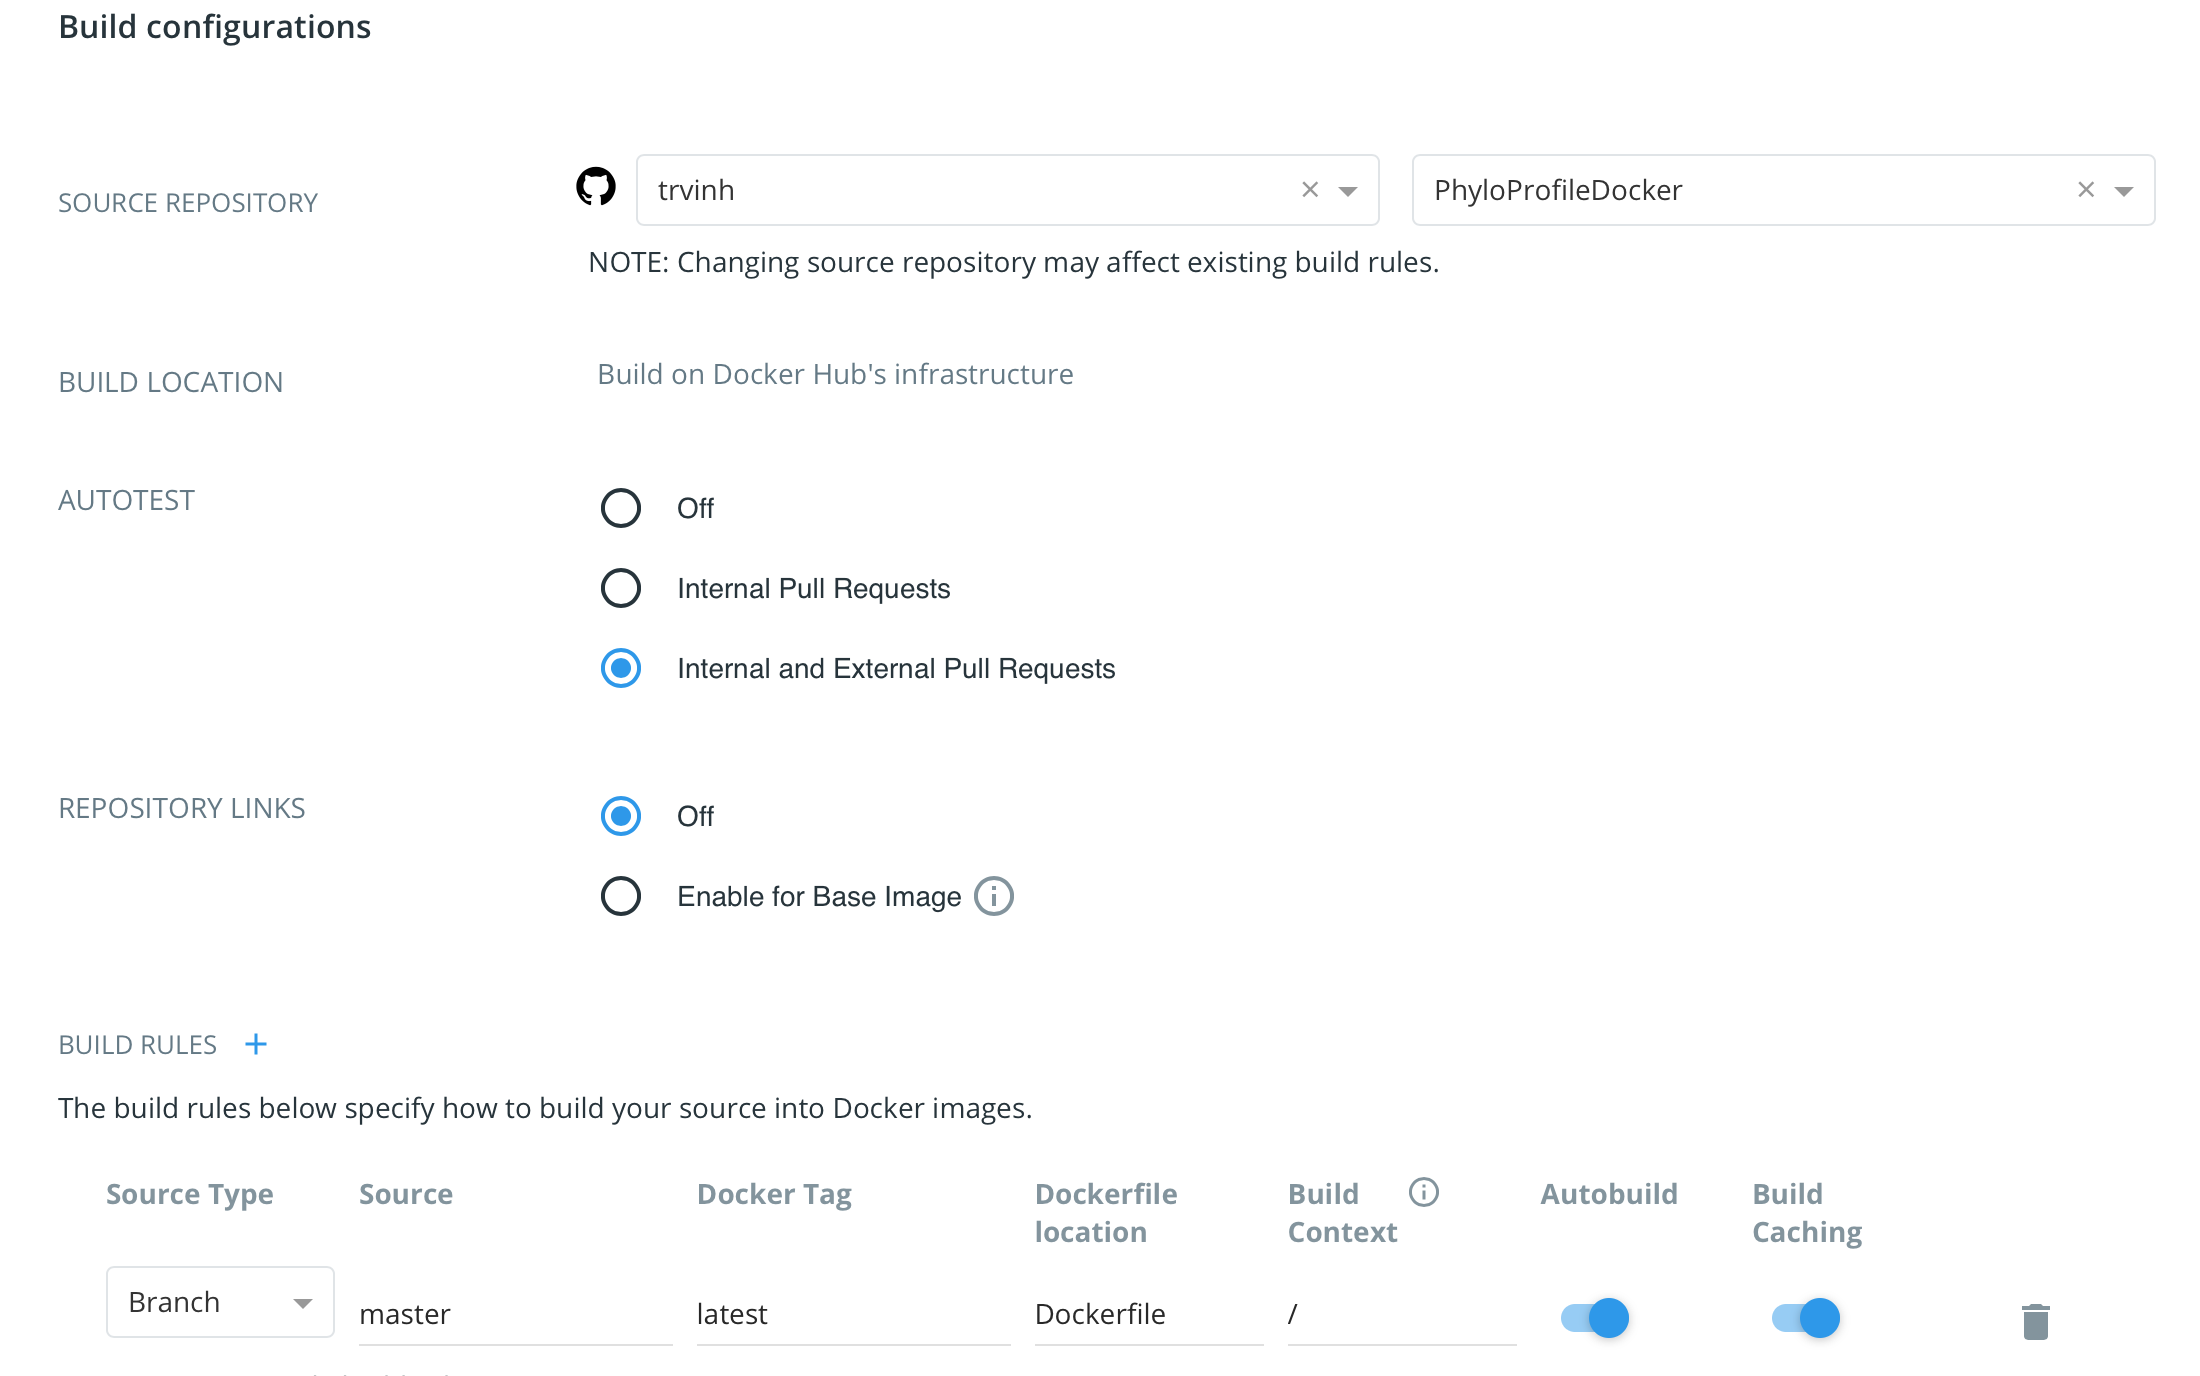
If we have our tool stored in a GitHub repository, we can link this repo with the Docker Hub repo so that, whenever we push changes into the GitHub repo, it will automatically trigger an image build in the Docker Hub. To do that, first we need to link the GitHub repo with our Docker Hub account. Then go to tab Builds in the Manage Repository of Docker Hub, click to Configure Automated Builds and set the settings there.
How to write a Dockerfile
Here I am showing you a Dockerfile for an R Shiny app container (PhyloProfile). It can be adapted to any other tools as you wish. The complete file can be found here.
PhyloProfileDocker/Dockerfile
# Set a base image (can be OS images like Ubuntu, Debian or CentOS; Python images; or in this case, R images)
FROM rocker/r-ver:3.6.0

# Autor or maintainer
MAINTAINER Vinh Tran

# Install Ubuntu packages
RUN apt-get update && apt-get install -y
    sudo
    gdebi-core
    pandoc
    pandoc-citeproc
    libcurl4-gnutls-dev
    libcairo2-dev
    libxt-dev
    libssl-dev
    libxml2-dev
    curl
    xtail
    wget

# Download and install ShinyServer (latest version)
RUN wget --no-verbose https://s3.amazonaws.com/rstudio-shiny-server-os-build/ubuntu-12.04/x86_64/VERSION -O "version.txt" &&
    VERSION=$(cat version.txt)  &&
    wget --no-verbose "https://s3.amazonaws.com/rstudio-shiny-server-os-build/ubuntu-12.04/x86_64/shiny-server-$VERSION-amd64.deb" -O ss-latest.deb &&
    gdebi -n ss-latest.deb &&
    rm -f version.txt ss-latest.deb

# Install PhyloProfile package
RUN R -e "install.packages('remotes')"
RUN installGithub.r "BIONF/PhyloProfile"
RUN installGithub.r "BIONF/PhyloProfileData"
RUN R -e "BiocManager::install(version = 'devel', ask = FALSE)"

# Copy configuration files into the Docker image
COPY shiny-server.conf  /etc/shiny-server/shiny-server.conf
COPY /app /srv/shiny-server/
RUN chmod 777 /srv/shiny-server/data/*.txt

# Make the ShinyApp available at port 80
EXPOSE 80

# Copy further configuration files into the Docker image
COPY shiny-server.sh /usr/bin/shiny-server.sh
RUN chmod +x /usr/bin/shiny-server.sh
ENTRYPOINT ["/usr/bin/shiny-server.sh"]
In this container, we need Shiny server configuration files (shiny-server.sh and shiny-server.conf). The Shiny App is stored in PhyloProfileDocker/app folder. The detailed structure of this example can be found in this repository.